Living in London, I enjoy getting out and trying all the latest cafes, studios and activities on offer, but sometimes you just can’t beat the fun you can have at home. So when one of my best friends said she wanted to come over and carve pumpkins, I embraced the chance to relive our childhoods. Yes, you can guess that we both spent our formative years in North America.


My Jack-O-Lantern is on the right. I was going for the exotic supermodel look with almond-shaped eyes, arched brows and a thin elegant nose, but the finished product wasn’t quite what I envisioned. My friend’s on the left, however, was every bit as goofy as she had intended. You can’t go wrong with geometrical shapes!

Pumpkins carved, I felt inspired to finish the deed by dispatching with the stringy innards and roasting the remaining seeds. Although I haven’t eaten homemade pumpkin seeds since I was a child, I now appreciate the health benefits more than ever. A handful of the magnesium-packed seeds is great for generating energy pre-workout, and it’s an ideal superfood to add to smoothies because it’s rich in fibre and can help to slow the absorption of other ingredients. Their high omega content also means they work to regulate insulin levels and prevent the type of sugar spikes that can lead to Diabetes. And because they’re extremely high in tryptophan, snacking on them before bed helps to promote a solid night’s sleep.
Roasted pumpkin seeds
Step 1: Clean and boil the seeds
First, you need to clean the lingering ‘pumpkin guts’ off the seeds, and to do this I boiled the whole lot for 10min. Although sugar pumpkins (the smaller ones traditionally used to make American pumpkin pie) yield crunchier seeds, the process of boiling the seeds of larger pumpkin varieties can help to improve their texture before roasting.
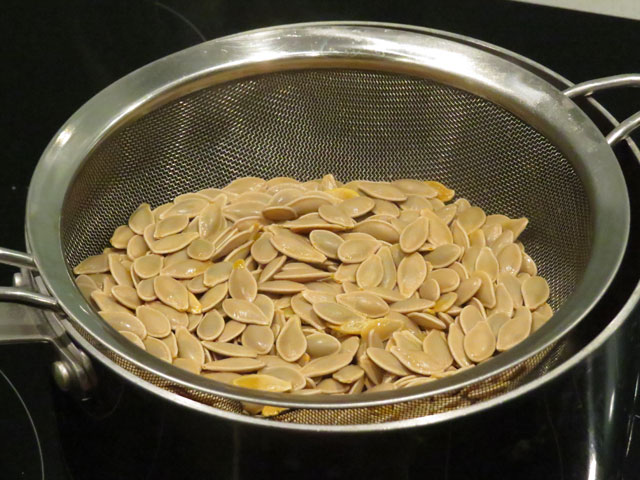
Step 2: Dry the seeds
Now this is important. After you’ve boiled the seeds, you need to drain and thoroughly dry them. Having not roasted pumpkin seeds for many years, I admittedly forgot this step, and my resulting seeds were just a touch slimy as a result.

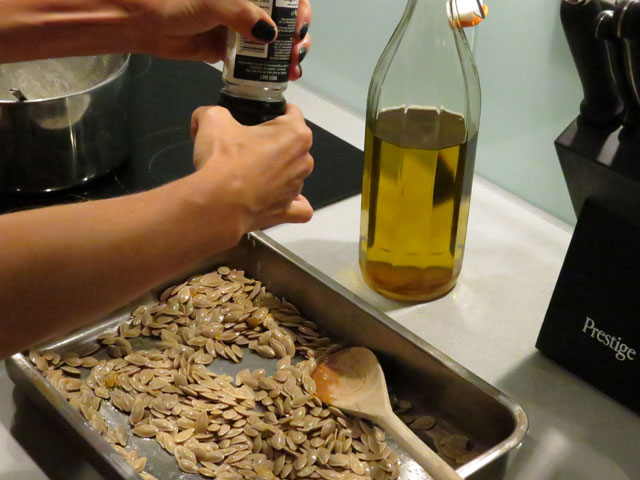
Step 3: Season to your liking
Here’s where you get to have some fun. Some people love sweet pumpkin seeds – think brown sugar and cinnamon or chilli and lime zest – but I fancied a more savoury option of olive oil, salt and paprika. Garlic is a popular ingredient in pumpkin seed recipes, too. Feel free to play around with flavours and be creative – there’s no right or wrong.
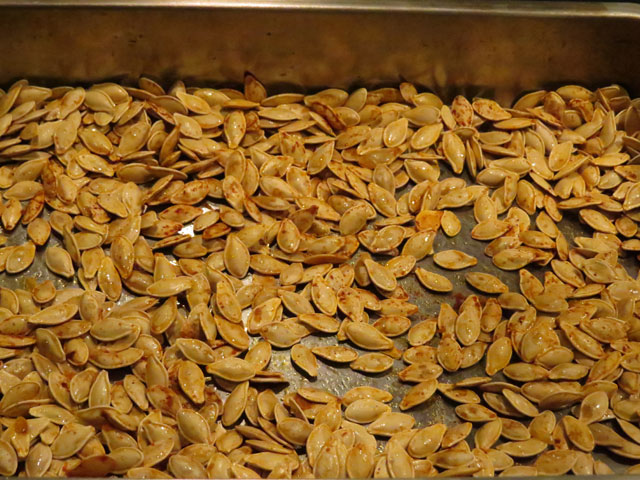
Step 4: Roast and serve
I roasted my pumpkin seeds at 200 degrees Celsius for 45min, taking them out twice to give them a stir and make sure they were evenly spread across the pan.
Although I mainly used my pumpkin seeds for snacking – and for blending in a smoothie or two – there are loads of ways to incorporate them into your diet. For instance, they work as a great alternative to pine nuts when making your own pesto. You can mix them with other nuts or dried fruits for a healthy high-energy trail mix when you’re on the go. Or combine them with kale, quinoa, chicken and tomatoes for a superfood salad worth bragging about on your lunchbreak. And if you’re feeling more indulgent, you can caramelise them in some brown sugar and use them to decorate a cake.
Lessons learned
At this point, I’d like to say I’m also preparing a post on pumpkin pie, but alas I must reveal that the ‘meat’ of the pumpkin rots just like any other vegetable. So after a week exposed to the open air, my poor Jack-O-Lanterns began sprouting mould from their eyes and had to be urgently expelled from my flat before they stunk us out! This I consider to be my most frightful Halloween experience yet. Sometimes, food really is just for fun. So if you’re planning on eating your pumpkin, don’t expect to gaze on your carefully carved masterpiece for more than a day before digging into the shell and boiling its contents down into a delicious pie mix.